Off-Season Pellet Stove Cleaning: Your Spring and Summer Maintenance Guide
Introduction
Spring and summer might seem like strange times to think about your pellet stove, but here's the thing – they're actually the perfect times for maintenance. As the team at Miles Pellet Stoves puts it, "it's nice being able to face that first cold day, you turn on the stove and it works rather than... oops, something's wrong, and you're left out in the cold."
Nobody wants to discover their stove won't start when the first cold snap hits in October. That's why we're breaking down the essential off-season cleaning steps that'll keep your pellet stove running smoothly all winter long.
Why The Off-Season Is Ideal For Cleaning Your Pellet Stove
Most people procrastinate until October and some hit the power button only to find their stove won't work. By tackling maintenance during the warmer months, you'll have time to address any potential issues, order parts at better prices, and ensure everything's ready when you need heat most.
Your Essential Pellet Stove Cleaning Toolkit
Before diving in, be sure to gather up these tools that are necessary for cleaning:
-Quality ash vacuum or shop vacuum
-Paintbrush or small bristle brush for detailed cleaning
-Flexible cleaning brushes for exhaust pipes
-Allen wrenches or drill bits for burn pot holes
Step 1: Front-End Cleaning
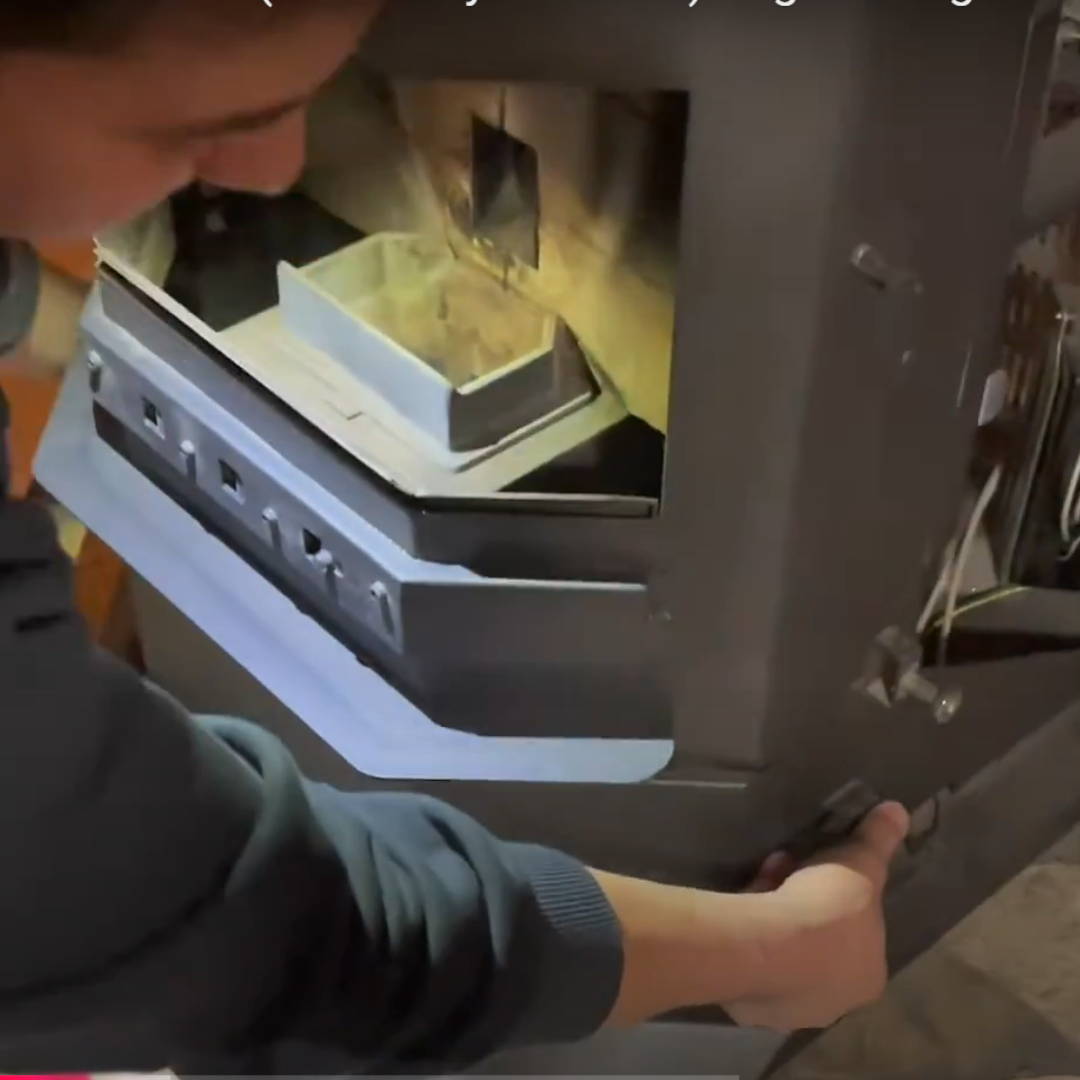
Start with your stove's main chamber. For ComfortBilt models like the HP22, remove and clean the burn pot every time you refill the hopper, but for deep cleaning, here's the process:
Burn Pot Care: Lift out the burn pot and empty contents into the ash pan. Scrape away any buildup and ensure all holes are clear – use an allen wrench if they're plugged. When reseating, make sure the igniter port hole faces the back and the pot sits flush on the cradle.
Heat Exchanger Cleaning: Use the pre-installed scraper (that chrome knob) and run it in and out several times. All the dust and ash falls down toward the burn pot and ash pan. For models without this feature, use your paintbrush to work from top to bottom.
Chamber Cleaning: Vacuum thoroughly, but here's a pro tip from the experts: keep your vacuum nozzle at a distance from gaskets to avoid fraying and breakdown.
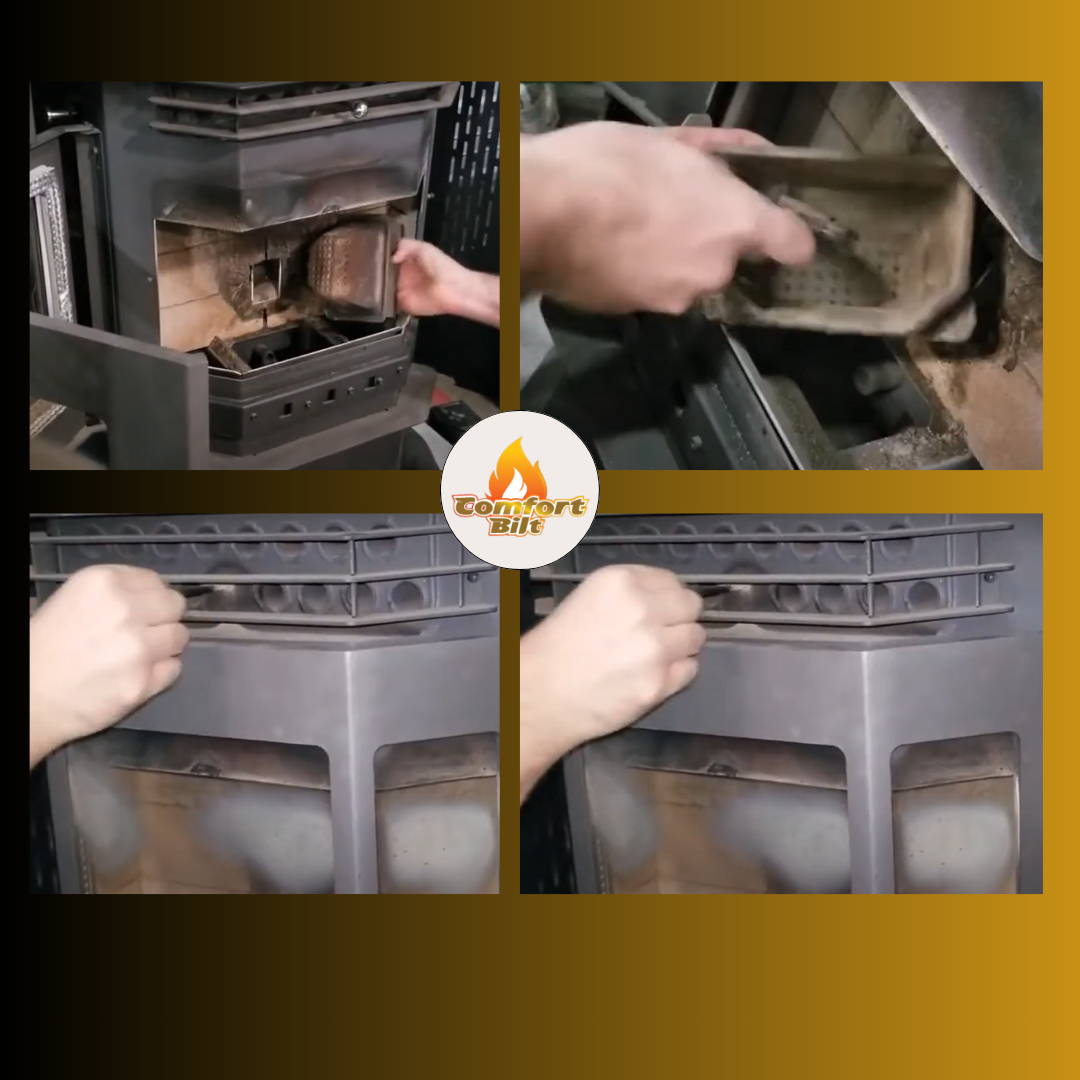
Step 2: Don't Forget the Deep Clean
Many people miss this crucial step. Behind the firewall and within hidden chambers, ash can accumulate even when the main area looks spotless. ComfortBilt pellet stoves have removable plates that reveal deeper channels – check your manual to locate these access points. Some pellet stoves require removing firewalls or unbolting panels, but this deep clean makes all the difference.
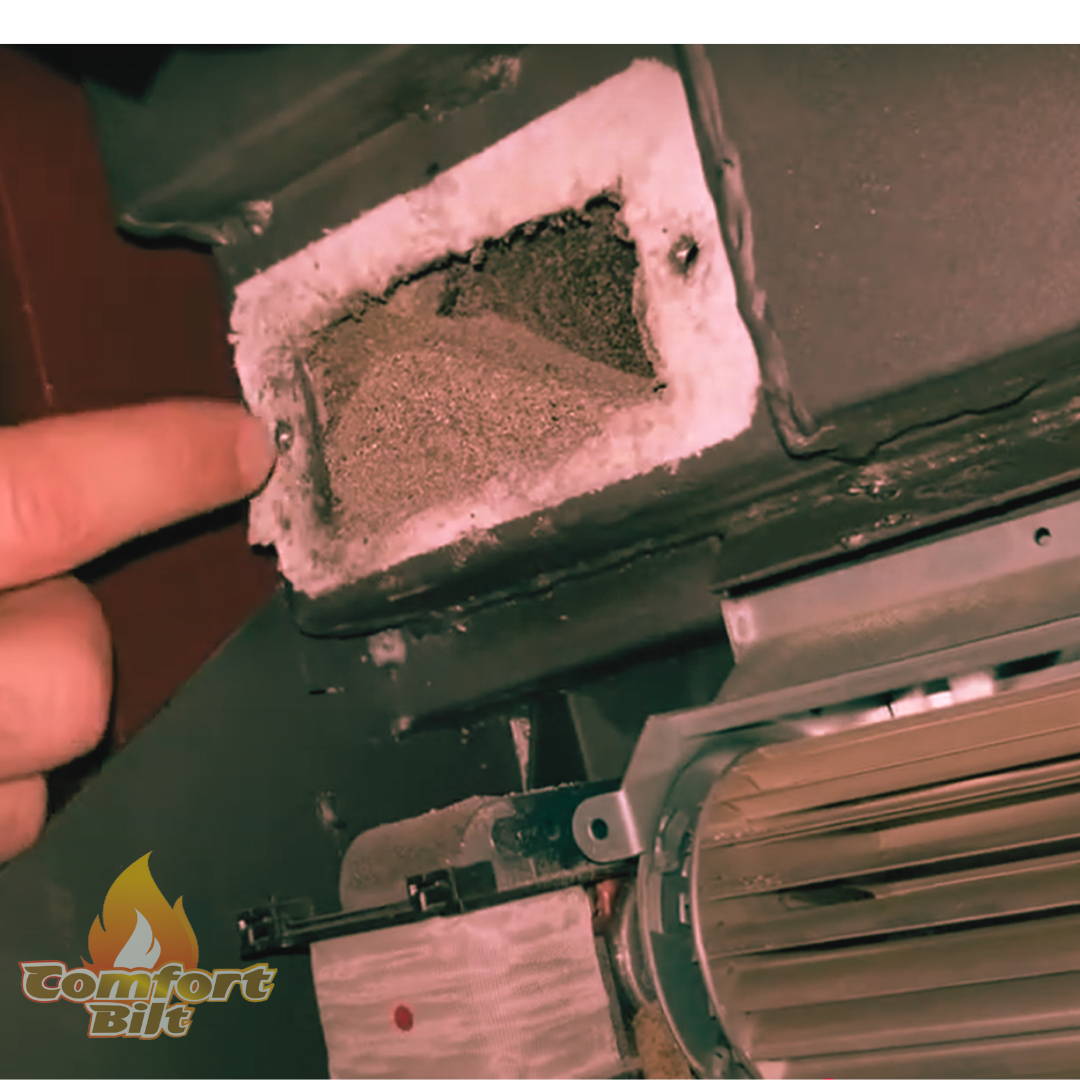
Step 3: Back-End Maintenance
Open your stove's back panel (some are magnetic, others require removing bolts). Focus on these key areas:
Auger Motor: Brush around it while vacuuming simultaneously
Room Air Blower: Brush, scrape, and vacuum everything out
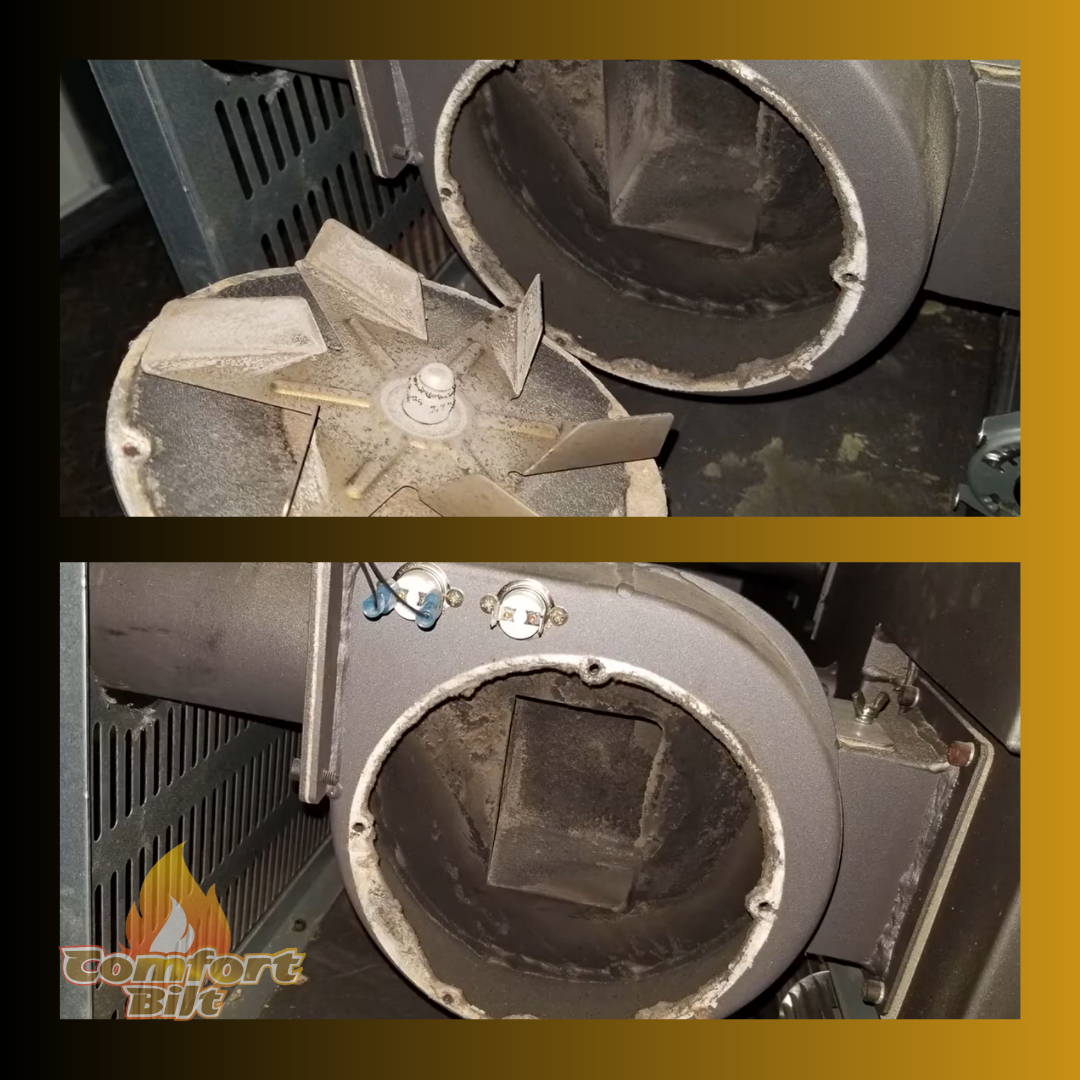
Exhaust Motor: This component "draws in so much dust," so give it extra attention with your brush and vacuum combo
Pro Tip: Check that vacuum switch tube – pull it off, blow compressed air through it, and reconnect. A clogged tube can cause major headaches.
Step 4: Exhaust System – The Game Changer
Your exhaust piping arrangement varies based on your setup – vertical venting, horizontal out the back, or up through an existing chimney. Regardless of configuration, clean the entire system, not just part of it.
The key insight from Miles Pellet Stoves: "Sometimes if you brush down from the roof and you don't access the little cap underneath... all the ash will collect there." Look for termination caps on T-joints and clean behind them.
Brush Selection Matters: Standard fiberglass brushes work for straight pipes, but if you have 90-degree bends, invest in flexible "bendy brushes." They're game-changers for navigating complex exhaust systems.
Step 5: Hopper Maintenance
Empty old pellets completely, especially if your home has condensation issues. Vacuum out all debris and refill with fresh pellets when fall approaches. This ensures you're starting the season with dry, quality fuel.
Step 6: The Critical Test Run
After your thorough cleaning, hit that start button! Your pellet stove goes through three phases: startup sequence, run sequence, and shutdown sequence. Make sure it completes all three without hiccups.
Listen for warning signs like bearing noise in exhaust or convection motors, igniter problems, or feeding issues. Catching these during off-season means parts are available and less expensive than during peak season.
Maintenance Schedule Made Simple
Every hopper fill: Clean burn pot
Weekly during use: Empty ash pan
Spring/Summer: Complete deep clean including exhaust system
Annual: Inspect exhaust piping thoroughly
The Bottom Line
As the ComfortBilt team emphasizes, proper maintenance timing is everything. Clean your glass when cool, store ashes in closed metal containers away from combustibles, and ensure all latches and seals close properly for optimal airflow.
Taking care of your pellet stove during off-season isn't just about preventing problems – it's about ensuring reliable, efficient heat for your family when winter arrives. Plus, you'll save money on parts and service calls by being proactive.
Ready to tackle your pellet stove maintenance? Your future self will thank you when that first cold day arrives and your stove fires up perfectly on the first try.
Want to see these techniques in action? Check out the detailed video guides from Miles Pellet Stoves and ComfortBilt's maintenance series for visual step-by-step instructions.
To watch Miles Pellet Stove Cleaning Tutorial on YouTube CLICK HERE.
To watch Comfortbilt Pellet Stove's cleaning tutorial CLICK HERE